| Photoshop Morphing. | |||
|---|---|---|---|
|
Photoshop Edit
|
Photoshop Layers
|
||
|
Original Frog
|
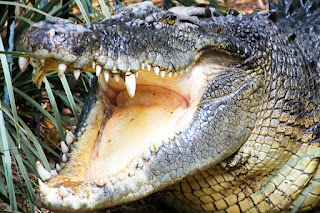
Original Crocodile
|
||
-I began by going to the website and acquiring all the images needed for the edit.
-Then I opened Photoshop and made a new project with the specific width and length.
-After it loaded up, I imported my Frog image.
-Then after that, I locked and hid the Frog image and imported the Crocodile image.
-Using the quick selection tool I went around and selected what parts of the crocodile I wanted to keep, and removed the rest.
-Then I unlocked the other images and moved the head of the Crocodile with the Ctrl+T tool, to the location I wanted on the Frog.
-After setting up my images to work together, I used the paint brush too with a little black and its opacity down quite a bit. Along side that, the stamp tool to morph the images together around their borders. And cleaned it up with the Eraser tool.
-Then once that was settled I made a fill/adjustment layer to deal with the color problem on the crocodile's head.
-This caused another problem, color correction in the mouth. So I had to go into the mouth with an eraser and clean up the layer by erasing the mouth and teeth areas.
-Then for some final touches, I used the dodge tool and cleaned up the borders again adding more of the frog texture or crocodile texture to make it look more "possible".
-Then for the end I used the Burn tool and made some shadows underneath the mouth and legs, this made it look more lite it was actually in the image.
-Finishing with a background was the final touch, and there you have it :).


No comments:
Post a Comment